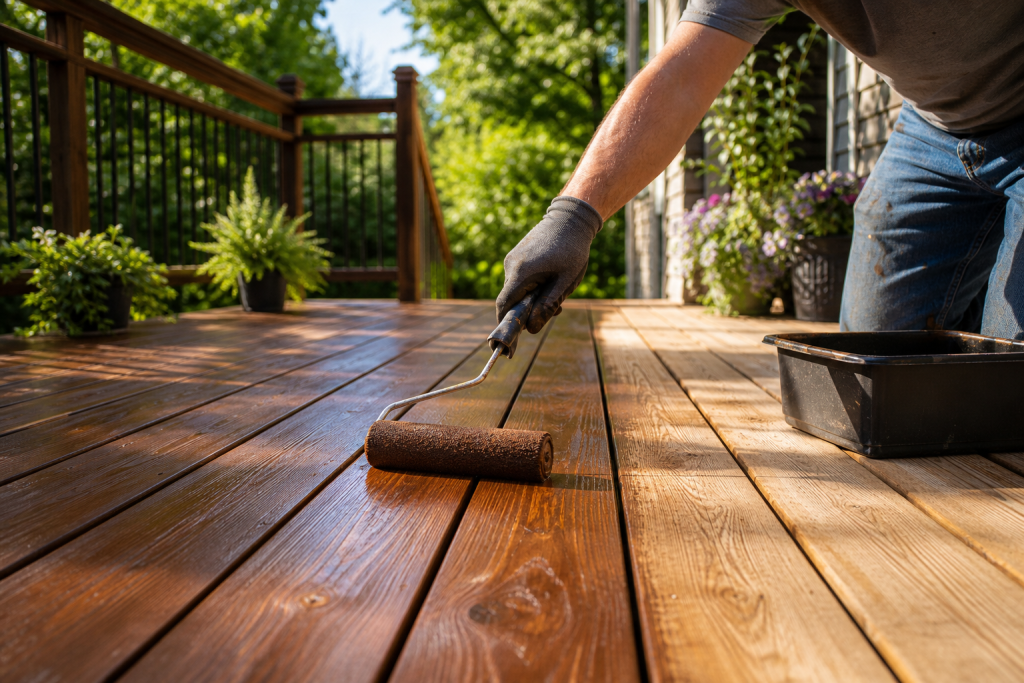
Deck staining improves appearance and slows surface wear when done correctly. This guide gives Mississauga and GTA homeowners an ordered workflow: a quick pre-check, an exact sequence for preparation and application, the tools and stain types to consider, realistic time expectations for a DIY weekend, common mistakes and fixes, and plain questions to ask a contractor if you decide to hire a pro.
Quick checklist: what to check before you start
Before you buy stain or set aside a weekend, run this short pre-check. If any item below needs more than minor work, stop and either schedule repairs or contact a contractor.
- Structural soundness: look for soft or rotted joists and boards that flex underfoot.
- Loose fasteners and rails: tighten screws and replace missing hardware.
- Surface condition: is old stain peeling, or is the wood grey and weathered?
- Drainage and slope: ensure water does not pond on the deck surface.
- Weather window: plan a dry stretch of days for application and drying.
Cleaning and sanding a wood deck are essential preparation steps to help finishes stick and to prevent peeling. Confirm you can commit to that work before purchasing product and tools. For stepwise preparation guidance see the Sherwin-Williams guide and practical how-to references from trusted home publishers such as Home Depot.
Step-by-step deck staining process
The process below is intentionally ordered with stop points. If a step uncovers a problem you cannot fix in one day, pause and either book a contractor visit or schedule the additional work before staining.
-
1. Assess and repair
Walk the deck systematically. Probe suspicious boards with a screwdriver for softness. Replace any deck board or joist that shows structural rot. Tighten loose screws and replace rusted nails with exterior-grade screws. If the framing is compromised, do not stain until structure is repaired.
-
2. Clean thoroughly
Remove debris, sweep, and use a deck cleaner or a diluted oxygen bleach solution for mildew and organic stains. Follow product directions and rinse thoroughly. Proper cleaning removes embedded dirt and old finish residue so new stain can penetrate. Manufacturer and industry how-to resources explain cleaning approaches and product choices in detail, for example the Sherwin-Williams guide.
-
3. Sand where needed
After the deck is fully dry, sand rough spots and any areas with peeling finish. Use an orbital sander for broad boards and hand-sanding for edges and rails. Do not over-sand. Remove flaky finish and smooth raised grain while preserving sound wood. Sanding helps the stain adhere evenly and reduces blotching.
-
4. Dry and test a small patch
Allow the deck to dry completely. Time to dry depends on weather and wood. Consult your stain manufacturer’s Technical Data Sheet before proceeding. Test a small, inconspicuous area with the chosen stain and follow the manufacturer’s application method. This test shows final colour, penetration, and compatibility on your deck species.
-
5. Read the Technical Data Sheet and plan logistics
Every stain has a Technical Data Sheet with coverage rates, thinning rules, recoat windows, and temperature limits. Follow those instructions for safe, effective application. The TDS also explains cleanup and disposal rules. For manufacturer guidance and application notes consult sources such as Benjamin Moore.
-
6. Apply the stain
Use the recommended applicator: brush, roller, or pump sprayer followed by back-brushing to work stain into the grain. Apply consistent, thin coats rather than heavy wet coats to avoid puddling in gaps. Work in small sections to maintain a wet edge and avoid lap marks.
-
7. Manage drying and recoat
Monitor the weather and keep foot traffic off the deck until the stain has reached the manufacturer’s minimum cure stage. Do not shortcut recoat or cure intervals. Those intervals ensure adhesion and durability. For realistic DIY timelines and weekend projects see practical notes from Home Depot and overviews from home advice publishers such as Consumer Reports.
Tools, consumables and how to choose the right stain

Choose a stain type that fits your goals. Transparent stains accent the grain but offer lower UV protection. Semi-transparent stains strike a balance between colour and protection. Solid stains give the most UV blocking and hide imperfections but look more like paint. Always read the manufacturer Technical Data Sheet for coverage and recoat guidance before you start, as product behaviour varies by formula and wood species. See specific application advice from Benjamin Moore.
Essential tools and consumables:
- Deck cleaner and scrub brush or a pressure washer with a low-pressure fan nozzle.
- Orbital sander and sanding pads for large areas, plus sanding block for edges.
- Paint brushes for back-brushing, a roller with a long nap for boards, and a pump sprayer if preferred.
- Staining sponges or small brushes for rails and tight gaps to improve control in detail work.
- Safety gear: NIOSH-rated respirator or approved face mask when sanding, safety glasses, gloves, and knee pads.
- Drop cloths and masking tape to protect hardware and nearby plants.
Timing and realistic time expectations
Many homeowners can clean and stain a typical backyard deck in a weekend if the deck requires only light repairs and you have one or two helpers. Cleaning and sanding usually take the greater share of time. Staining itself is fast when prep is complete. However, drying and recoat windows depend on product and weather, so consult the stain Technical Data Sheet for minimum cure and recoat intervals before promising a finish date. Retail how-to resources explain how a standard weekend project maps to these steps for typical decks. See the Home Depot overview and Consumer Reports stepwise notes for practical expectations.
When to repair or replace boards before staining
Stain is a surface treatment and will not fix structural problems. Replace boards when you find any of the following:
- Soft or crumbling wood under a screwdriver probe.
- Severe warping or cupping that creates trip hazards or allows standing water.
- Significant rot at the joist or ledger, which affects load-bearing capacity.
If repairs involve framing, joist replacement, or ledger plate work, schedule that work before staining. Local deck and fence contractors offer repair and staining packages. Homeowners can review service details such as design, build, painting, and staining at the company site for trusted options in the Mississauga area. Immediate Fence Repair lists deck painting and staining among its services and offers callback and booking options for GTA homeowners.
DIY risks and common mistakes with remedies

Common errors and how to fix them:
- Applying stain to a dirty or damp surface. Clean and allow full drying, then test a patch before full application.
- Using too heavy a coat. Thin, even coats penetrate better and dry faster. Wipe up puddles immediately.
- Not following the TDS. Always confirm temperature and humidity limits and recoat windows on the product sheet. Manufacturer guidance is authoritative on these points and prevents adhesion failures.
- Skipping a test patch. Test patches reveal colour and adhesion differences between species and previous finishes.
- Rushing recoat times. Premature foot traffic can mar a finish and require spot touch-ups or a full recoat.
When in doubt, stop and check the TDS or seek a contractor’s opinion rather than continuing a risky application that might require stripping later. Manufacturer and independent resources outline these common errors and remedies in detail for homeowners preparing to stain a deck. See product preparation recommendations from Sherwin-Williams and application guidance summarized by Consumer Reports.
Hiring a professional in Mississauga: what to ask and what to expect
If you prefer to hire a professional, use this checklist when you call for quotes. A proper quote should be written and include prep work, repairs, products proposed with brand and formula, expected coverage, number of coats, expected drying windows, and a warranty or satisfaction policy.
- Ask which stain brand and formula the contractor recommends and why.
- Request a written scope with explicit prep tasks: cleaning method, sanding extent, and repairs included.
- Confirm safety measures for nearby plants and surfaces and disposal of wash water or leftover product.
- Check references and recent project photos, and verify insurance and any local business verification.
- Ask about scheduling windows that match dry weather in Mississauga and the contractor’s plan if rain appears.
Immediate Fence Repair provides callback and appointment booking options and lists deck staining and painting among its services. If you would like a local quote or a site assessment, visit Immediate Fence Repair to request a callback or book an appointment.
Aftercare and maintenance checklist
After staining:
- Keep off the deck for the manufacturer’s recommended cure period, then avoid placing heavy planters directly on freshly treated wood.
- Clean annually and inspect for peeling, loose boards, or mildew. Spot-treat areas that show accelerated wear.
- Do not assume a fixed maintenance interval. Reinspection frequency depends on exposure, species, and the product used. Follow manufacturer and professional advice when planning the next maintenance cycle.
Resources from stain manufacturers and independent reviewers are the best immediate references for product-specific aftercare instructions, so retain the product Technical Data Sheet and your contractor’s care notes for future maintenance planning.
Frequently asked questions
How do I know if my deck needs staining or replacement
If boards feel soft, show significant rot, or the ledger and joists are compromised, those are replacement or repair conditions. If the wood is sound but faded or the old finish is failing, staining is appropriate after necessary repairs. For structural concerns, schedule repairs before staining and consult a qualified contractor.
How long does a typical DIY deck staining take and can I finish in one weekend
Cleaning, sanding, and testing usually take the most time. A small to medium deck in good condition can often be cleaned and stained over a weekend, but drying and recoat windows vary by product and weather. Check the stain Technical Data Sheet and plan for possible additional days if the weather is cool or humid.
What weather conditions are safe for staining in Mississauga
Choose a stretch of dry days with moderate temperatures and low humidity. Avoid staining before rain or during very cold or hot conditions. Confirm the manufacturer TDS for the recommended temperature and humidity ranges for the specific stain you choose.
Should I sand my deck before staining and how aggressive should sanding be
Sanding is recommended where the surface is rough or an old finish is flaking. Use an orbital sander for boards and hand-sand edges. Remove loose finish and smooth raised grain but avoid aggressive sanding that removes sound wood. Sanding improves adhesion and produces a more uniform finish.
What questions should I ask a contractor before hiring them for deck staining
Ask for a written scope and product names, examples of previous work, a timeline that accounts for drying windows, insurance details, and a satisfaction guarantee. A clear, itemized quotation that states prep and repair tasks is an important trust signal.
Ready to book a local assessment or receive a quote for deck staining and maintenance? Contact Immediate Fence Repair for callback and appointment options: Immediate Fence Repair.